The wild version of a Pal and its boss version are two separate rows in the game data. Level and size are the least of the differences — damage taken, capture rate and experience are all rewritten. The exact multipliers follow, row by row.
Alpha Pals
The crowned ones with a title in front of their name. 313 Pals have an Alpha version, and against the wild row it changes:
| Field | Change |
|---|---|
| HP base stat | × 1.2 |
| Damage taken | × 0.24 (in most cases) |
| Capture rate correction | × 0.7 |
| Experience granted | × 10 |
| Ride sprint speed | +100 (on the 91 rideable Pals) |
| Size | noticeably larger hitbox |
Alphas feel spongy because of the damage reduction, not the health bar. The HP base rises only a fifth; the bar looks far longer because the Pal is also a much higher level. The × 0.24 damage-taken modifier is what absorbs the damage — three quarters of every hit is removed.
The reduction is not uniform. The data has four tiers:
| Damage taken | Count | Examples |
|---|---|---|
| × 0.48 | 44 | Chikipi Lifmunk Rushoar Fuack |
| × 0.24 | 261 | the standard tier, most of the roster |
| × 0.18 | 5 | Necromus Paladius Frostallion Frostallion Noct Jetragon |
| × 0.04 | 2 | Silvance Dandilord |
 Chikipi
  Lifmunk
 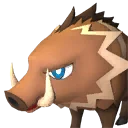 Rushoar
  Fuack
Fuack Necromus
  Paladius
  Frostallion
 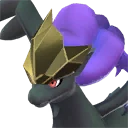 Frostallion Noct
  Jetragon
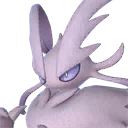 Silvance
 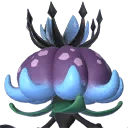 Dandilord
The 44 Pals at × 0.48 are mostly low-rarity early species with half the usual reduction, which makes them the sensible place to learn the fight. The toughest ordinary Alphas are Silvance and Dandilord at 4% damage taken. In the other direction, Panthalus is the exception: its Alpha takes × 1.2, more than the wild version.
 Panthalus is the exception: its Alpha takes × 1.2, more than the wild version.
Capture rate is multiplicative. A Pal whose own correction is 1.0 becomes 0.7 as an Alpha; one sitting at 1.5 becomes 1.05. For real odds, run it through the capture rate calculator with the level and remaining HP.
Predator Pals
48 Predator forms exist in the data:
| Field | Change |
|---|---|
| Damage taken | × 0.2 (47 of 48) |
| Max HP | × 2 (47 of 48) |
| Capture rate correction | × 0.7 |
| Damage dealt | × 1 to × 10, varies per Pal |
| Experience granted | × 10 to × 40 |
| Flinch / knockback | 37 of 48 are fully immune |
Unlike Alphas, Predators genuinely have double the health, and most ignore flinch and knockback outright, so their animations cannot be interrupted. The payoff is experience: the top tier grants 40×, one of the fastest ways to level.
Tower bosses
The nine tower bosses run on a completely separate set of numbers: Shadowbeak, Grizzbolt, Faleris, Lyleen, Orserk, Bastigor, Selyne, Shaolong, Astralym.
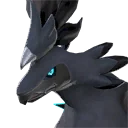 Shadowbeak,
  Grizzbolt,
 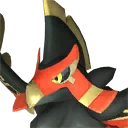 Faleris,
  Lyleen,
  Orserk,
  Bastigor,
  Selyne,
 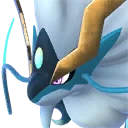 Shaolong,
  Astralym.
| Field | Phase one | Phase two |
|---|---|---|
| Max HP multiplier | × 12 to × 62 | × 75 to × 405 |
| Damage taken | × 1 (no reduction) | × 0.1 to × 0.45 |
| Damage dealt | × 0.7 to × 1 | × 5 to × 13 |
| Experience granted | × 30 | × 30 to × 35 |
| Flinch / knockback | immune | immune |
| Capture | not capturable | not capturable |
The structure is straightforward: phase one is a wall of health that takes full damage and hits at roughly wild strength — Astralym (× 0.7) and Shaolong (× 0.9) even hit slightly below it — while phase two turns on the reduction and pushes damage output to 5–13 times. The dangerous stretch is the back half, so there is no reason to hold resources back early.
Tower bosses are immune to flinch and knockback for the whole fight. A build that relies on interrupting them achieves nothing; positioning is all that works.
Raid bosses
The altar summons, 19 rows in the data. On top of enormous HP multipliers, roughly half carry × 100 status resistance, so status effects effectively do not land. Freezing or entangling one to buy time is not an option — damage and type advantage are.
Before the fight
Type advantage is × 2 with the right element and × 0.5 with the wrong one. Against something taking 24% damage, that fourfold swing does more than a better weapon. Check the type chart first.
Learn on the × 0.48 tier. Chikipi, Rushoar and Lifmunk Alphas have half the usual reduction and low levels, and are the first Alphas you can reliably solo.
Bring an Alpha's HP down before throwing. The capture correction is multiplied by 0.7 and the level sits above the local wild Pals, so a full-health throw mostly wastes spheres. The capture rate calculator shows what each sphere does at a given HP.
Base stats and capture corrections for every Pal are on the Paldex, one page each.